DIY Ikea Server Cabinet
Introduction
I have decided I “need” a server rack to consolidate all the home networking equipment in one location and to organize all the cable mess I have in the house. So the first thing I need to do is to get an equipment rack (obviously) but the more important consideration here is the WAF.
See anyone can go out there and buy an equipment rack. There is no rocket science in this. Most server racks are black in colour and although white racks are available, they are not very common. What I don’t want to do, is to end up with a black colour server rack sitting at the corner of the house, constantly reminding us of its presence. This is not an office environment after-all. It is less of a problem if we have a spare room which we can call a “server room”. For those of you who actually have this kind of luxury, all the power to you. For the less fortunate among us, we have to improvise.
Sourcing a Rack
I have evaluated my own networking needs and concluded that I need a server rack no smaller than 21RU. Just for information, 1RU means 1 Rack Unit and this is typically 44.5mm in height. So 21RU rack would be a tad shorter than 1m in height. Equipment racks come in various sizes but I suspect anything smaller than 16RU is probably only useful if you don’t have much rack mounted equipment other than patch panels, network switches and perhaps a small compact server and UPS. For those of you who have more networking equipment, 27RU and 32RU would probably be a better fit; if not, go full size 45RU. Although I think this is really quite over the top for a home environment.
There are many talented individuals on Youtube who have succeeded in building their own server cabinet. Some even managed to build a server rack using several $10 Ikea LACK tables. Very cool indeed. I watched many of these videos but decided that this is not what I really wanted to do. I decided to go for a metal cabinet.
Racks can generally be sourced from Gumtree if you don’t mind to buy used. The problem for me is that these used racks are typically already assembled and it is extremely difficult for me to arrange transport for any rack bigger than 21RU – not to mention these racks are not that light to begin with and I will need a trailer/truck for this. Too hard I reckon.
A typical 22RU 600×600 rack from say 4cabling.com.au is AUD $676. A 27RU 600×600 rack is approx AUD $800. I guess I could have just go for the 600×600 rack and be done with it but I don’t really like the look of it in my study area. So after much searching, I decided to buy an equipment rack that is intended for AV equipment rather than server equipment, with the intention I will build an external cabinet to house the rack itself. An AV equipment rack share the same rack rails as a server rack so any equipment with rack ear will fit just as fine.
I bought the Samson SRK21 21RU rack from StorDJ for AUD $175. The list price is AUD $199 but they have a sale at that time and I got it slightly cheaper. The 16RU version is like $15 cheaper so getting the bigger 21RU version is a no brainer.
The rack comes with locking castors which is great. It does not come with front and rear door but this doesn’t matter to me because I don’t need them anyway. I guess I could have opt for an open-frame rack but I could not find these with castors which are really important for me.
The rack comes in unassembled form and assembly is pretty easy. The rack measures 505mm W x 455mm D x 1090mm H when assembled. So there we have it, a server rack in the making.
Possible pitfalls:
Be very careful in evaluating your rack spatial requirement. If you will be using networking equipment that are bred for “Real” server applications, such as those rack mounted servers, do note that most of these equipment are extremely deep. Any rack that is less than 600mm deep will not fit. Depending on what you use, you may have no choice but to go for a 800mm deep cabinet.
Building the Server Cabinet
So as I have said earlier, I don’t want a black colour server rack in the room. ServerEdge Australia sell a server that resemble more of an office furniture than a rack. Have a look here –
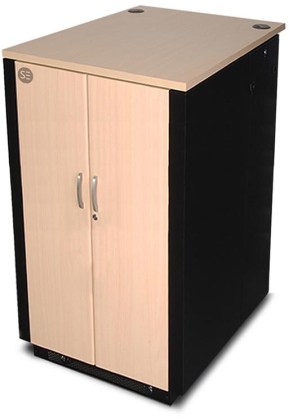
It is soundproof (although soundproof means to me that ventilation is going to be an issue) and the whole thing spelt premium all over. This thing sell for $5.5K. Too bad I don’t have that kind of cash. So if we are going cheap, we have to be more resourceful. This will involve some DIY building but isn’t that the joy of DIY.
I took a trip to Ikea and found out that the Ikea Stuva range is actually quite perfect for what I need. I bought the larger cabinet for AUD $70 at that time. Ikea seems to have increased the price to AUD $80 now. This comes in white. Matches the wall colour. Wife is happy.
I also chanced upon 2 of the Ikea Glassvik doors with smoke glass at the “As-Is” corner. Both did not come with handles but there is not one single scratch on the glass door so I am pleased. I bought these for AUD $28 each (original retail price is AUD $45 each). The Glassvik doors are intended to fit the Besta frames but these will also perfectly fit the Stuva.
GLASSVIK Glass door, black, smoked glass
Then I needed the hinges as the doors do not come with one. These cost me $10 for a 2-pack. So total cost for 2 doors is $20.
BESTÅ Soft closing/push-open hinge
The Ikea Stuva with dimension 600mm W x 500mm D x 1280mm H is just nice for me to insert the Samson rack into cabinet. But alas it is not quite deep enough :-O. With doors fitted to the Stuva, I can just close the door but it is just too tight for comfort. I would like another 150mm spare space at the back of the cabinet for cablings and the like.
So with the Stuva frame assembled and the rack inserted, this is how it looks. Not quite what I want.


So back to Ikea.
This time I bought 2 of the Besta frame 600mm W x 200mm D x 640mm H. A bit pricey at AUD $50 each. Why I bought these 2 Besta frames in the first place is that if I stacked these 2 frames one on top another, I will get 1280mm H which is exactly what the Stuva frame is. So I reckon I could frankenstein the 3 pieces together to fit the rack better. So rightly or wrongly that is what I thought at the time.
Next I wanted to assemble a plywood base so that the Stuva frame and the Besta frames can both be fastened together on the same level footing. I went to Bunnings and bought a piece of 1800mm L x 600mm W x 18mm Thk laminated pine for AUD $42. I also bought a 1200mm L x 600mm W x 12mm Thk particle board for $12. I wanted a sturdy base for the cabinet and considering the width of the laminated pine is exactly 600mm like the Stuva/Besta frames (so I don’t have to cut/trim any further), I think it is a perfect fit although pricey.
So with all the materials, I am ready to get to work.
First I disassembled the Stuva frame I had previously completed. Time to have a fresh start.
I first cut the laminated pine board to size – approx 700mm in depth.

Then I put the base of the Stuva and Besta frames onto the pine board and fasten using wood screws.

The end result look like this:

Then I assemble the rest of the wall pieces.

And then I cut away the part where the top Besta frame and bottom Besta frame meet, because that section is preventing me from sliding the rack further into the cabinet.
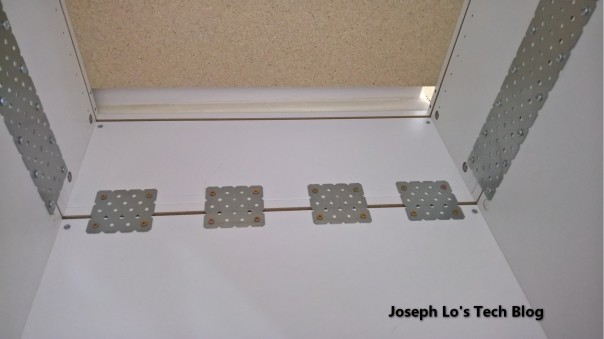
I also reinforced the internal side walls using some flat metal brackets that I also got from Bunnings. These cost about $2.50 for a small 200mm piece and $6.20 for a larger 600mm one.

Then I fasten the plate onto the side walls using screws. And this is what I get:


Not very pretty and a bit of a frankenstein but…..
And with the rack fitted


Seems to work.
Then I realized I forgot to remove the back panel of the Besta frames. Aargh! I managed to remove it with great difficulty given the panels are all solidly fixed together now.
I flip the cabinet and fit the particle board to the back.


The particle board does not fully cover the bottom part of the rack which is fine because that is where my cables enter into the rack.
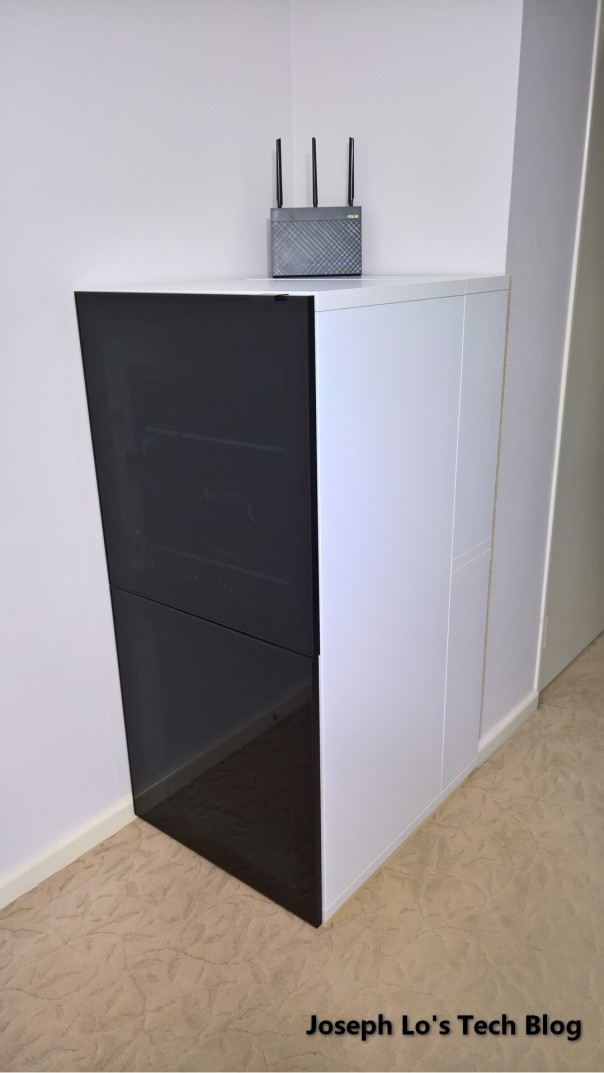
I drill a 20mm hole at the top left for the cabling connection to my router which I wanted to place outside of the rack. In actual fact I did not get any degradation in wifi strength when I had the router inside the rack but it is a mental thing for me – wireless router should be placed outside the cabinet not inside.


I also cut a rectangle hole to allow the GPO to protrude through the particle board. And also I trim the bottom edge to allow cables to enter the rack via the wall.


And with the rack inserted into the cabinet.
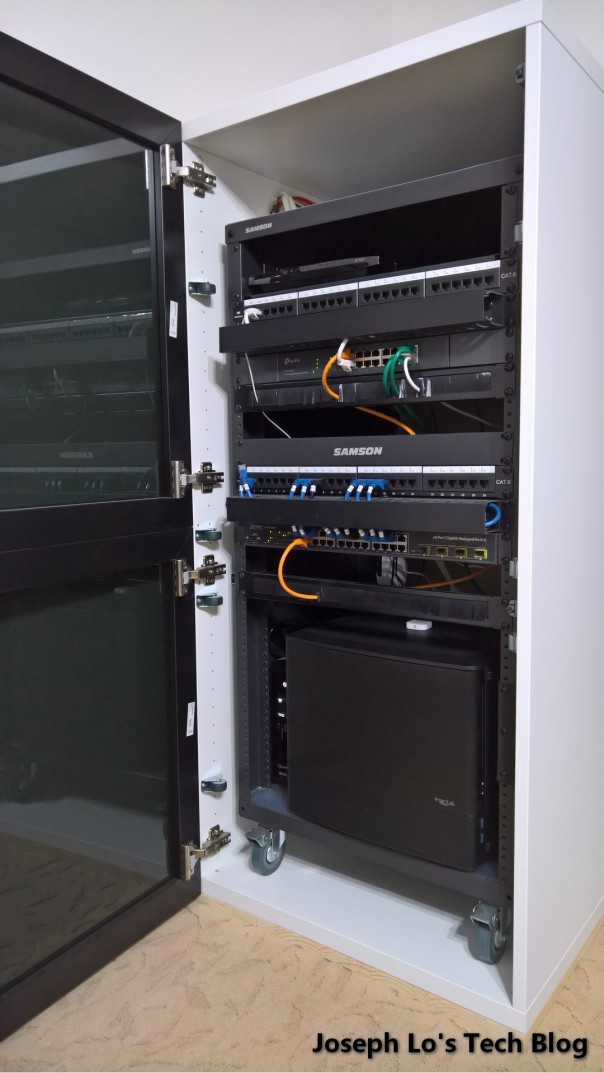
I have really enjoyed the build process and am well pleased with the overall outcome. Total expenses thereabout = AUD $500. Not as low cost as I had originally intended and there may be a better way to construct the actual cabinet shell to give a far better result. If anyone has better ideas please share below :-). Thanks for reading! ![]()
