Beginner Budget Audiophile – Wharfedale Diamond 10.1 and DIY speaker stand project
This post is probably several months late but it is better to be late than never 🙂
I have always wanted to have a better sounding music audio system but have never really gotten around doing this until a couple of months back. As music reproduction is my primary aim, I am mainly interested in a set of stereo speaker and not so much on a 5.1/7.1/ 9.1 speaker system which is really only useful for watching movies and the like. So at the recommendation of a friend (who is into some serious hifi gears), I bought a set of the Wharfedale Diamond 10.1 speakers. These are not the latest speakers on the market but as I am just a beginner on a tight budget, this will have to do for now. I was originally recommended to go with a set of floor standing speakers but cannot afford the budget at this stage. Maybe in future.
Whats-Hifi gave the Whearfedale Diamond 10.1 speakers a 4 out of 5. Not too shabby I would say. See review [here]. More information of these speakers at Wharfedale website. I bought the speakers from CSVshop, a local retailer based in Sydney. The owner Joe Breen is extremely helpful. The Wharfedale 10.1 is available in several colours and I wasn’t sure which colour looks better in the living room. Joe happens to have a set of Wharfedale 10.1 speakers (Wenge in colour) in his store and offered to take a picture and emailed me. I paid $289 for the speakers plus $38 for the delivery. May or may not be the best deal in town but I am happy for the price I paid. The delivery man takes his time in the delivery but Joe is helpful to track down the package and his service is just top notch. The Wharfedale Diamond 10.1 comes with several wooden finishes – Cool Maple, Wenge, Blackwood, Cinnamon Cherry, Winter Maple, Walnut Pearl and Rosewood Quilted. What a selection.

Wifey and myself both prefer either the Wenge and Rosewood Quilted but it is extremely difficult to make the final choice. Joe’s photo help a fair bit. But the biggest help comes from this Japanese website: http://www.ippinkan.com/wharfedale_diamond10-1.htm. This picture is the one that says a thousand words.

It is believed that the speaker furthest away is Cool Maple followed by Winter Maple, Rosewood Quilted, Walnut Pearle, Wenge and lastly Blacwood. We then made the choice to go with Wenge…but Rosewood Quilted does look good also. We are happy with our colour choice so far.
And because these are bookshelf speakers, I will need to find a way to stand them. A look at off-the-shelf bookshelf speaker stand suggested that I will be looking at a price approximately $200 or so. Some of the better looking ones cost upwards of $500. Many serious audiophile would have just bought these speaker stands and not even wink or think twice. I cannot afford to do the same so DIY becomes my only viable choice. I did look at gumtree and those used furniture stores but good speaker stands of the right size is hard to come by. So I decided to do it myself. I don’t have the greatest woodworking skills so I am crossing my fingers all the way, hoping things will turn out okay for me and I am pleasantly surprised that the outcome is better than I thought.
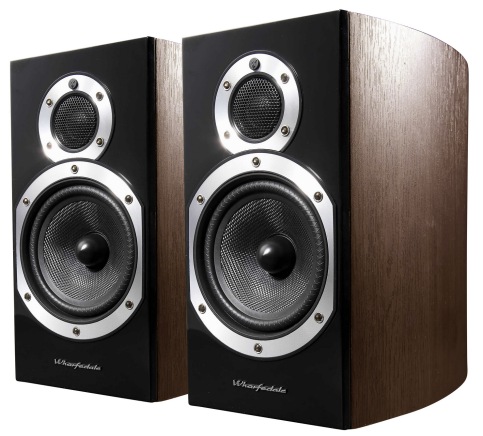
The engineer in me said I should plan for the design and construction. So I did a quick mockup design using Google Sketchup. Here is how I intend the design to look like. Obviously the design of the speaker stand is a very subjective taste. I don’t want to make a stand that is too squarish (or rectangularish) looking so I decided to shape the wood to match the curvy shape of the speaker. But I don’t want to go overboard with too much complexities here as I am still an amateur in terms of woodworking….and on a budget.
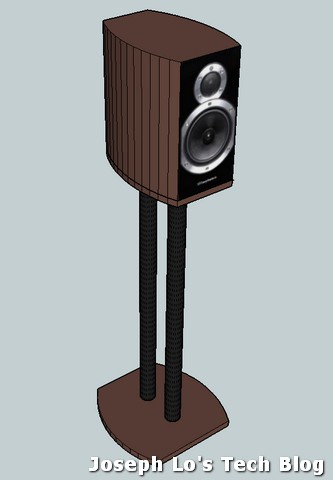
And here is the actual stand without the speaker.

I must say I did have a good look at all the tutorials and how-to guides as far as speaker stand construction is concerned. Google Image Search is your friend here. Some of the more well known articles are:
- http://www.tnt-audio.com/clinica/stubby_e.html
- http://www.audiotweaks.com/diy2/robs_stands/page01.htm
- http://www.lifehacker.com.au/2010/07/diy-cable-organising-ikea-speaker-stand/
I am particularly impressed with the handiwork of Robert Wong’s speaker stand (see the second URL above). The 3rd link shows a speaker stand using the Vika Curry table leg from Ikea….a great idea as well. Robert uses metal tubing for the legs. Many others just use a simple PVC pipes. But I like the Ikea table leg idea so I am going to borrow that idea for this project.
These are the ingredient I used:
- 4 sets of Ikea Adils table legs. The Vika Curry table legs have been discontinued. So I bought the Ikea ADILS leg at A$7.50 each. I bought the black colour ones. The height of the leg is also ideal because the tweeter position is just at or slightly above my ears when I am sitting down on my sofa chair. Total cost of the legs is therefore $30.
- 1 piece of 1800mm (L) x 300mm
 x 18mm thk Pinewood laminated panel from Bunnings. I dislike MDF boards so will not be using these. I also get Bunnings to cut the board into 4 equal size 300mm x 300mm pieces. This ends up with a spare 600mm length board which I then used in another project. Cost of the pinewood board is $19.50. Cutting service cost $1.00 so this comes to a total of $20.50.
 - Some hardware such as bolts, nuts, screws, etc. I don’t quite remember now what are their sizes and don’t know how much they cost….but they are just bolts and nuts…nothing spectacular.
- Varnish, sandpaper, brushes and the like.
I estimated that the total cost of the outlay is less than $100. The main bulk of the cost came from the Ikea table legs and the pinewood panel.
Assembly procedures:
Unfortunately I don’t have too many photos to share how I actually build the speaker stand. I was so engrossed with building the thing that I forgot about taking pictures. So the following is an over-briefed account of what I eventually did.
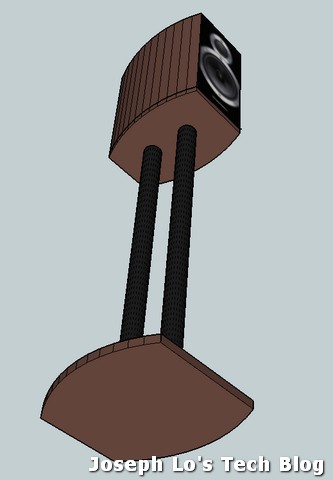
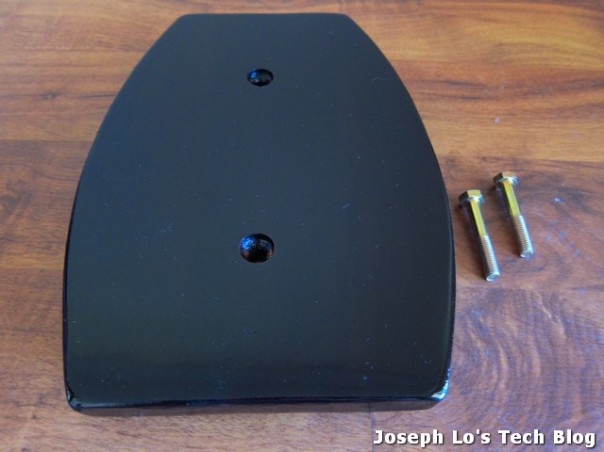
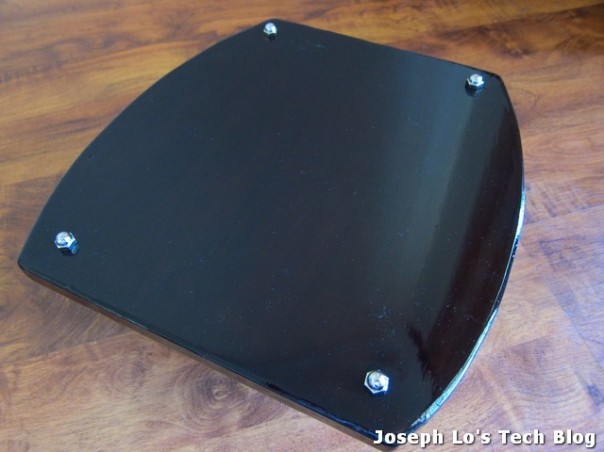
Essentially what I did with each of the 4 pieces of 300mm x 300mm pinewood board is to use a multitool to cut the board to the right size/shape and then use the sander accessories to further sand down the edges. The picture below shows the base plate for the speaker itself. They are both cut to the right shape following the speaker but the one on the left is the unsanded version and the one on the right has been lightly sanded on its edges.
I measured and aligned the Adils table leg to the speaker base panel so that they are in a straight line. Then I drill a hole through the board so I can get a bolt to pass through the board. We don’t want the head of the bolt to protrude from the panel and to give it a flush finish, I use a countersunk drill bit to drill the hole slightly larger than the head of the bolt itself. The Adils table legs are very strong and each comes with a flange plate screwed to the post. The flange plate is ideal for my purpose.

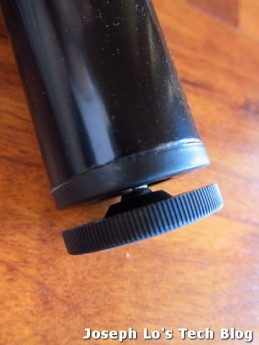
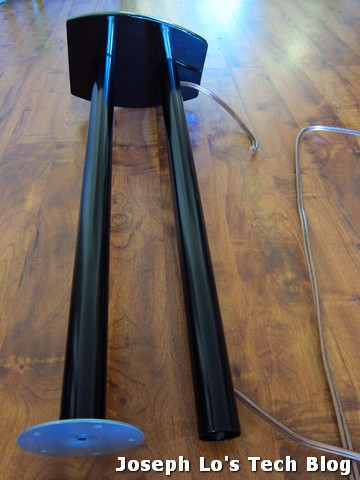
The other end of the leg has this removable height adjustment screw which is again ideal for my needs.
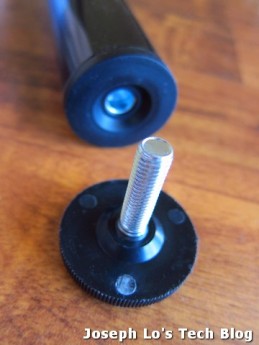
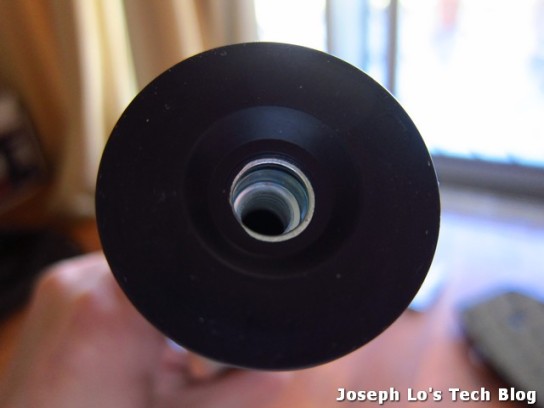
What I did was to totally remove the end piece. You will see that the end of the leg has this plastic holder thingy that can accept a normal threaded bolt.
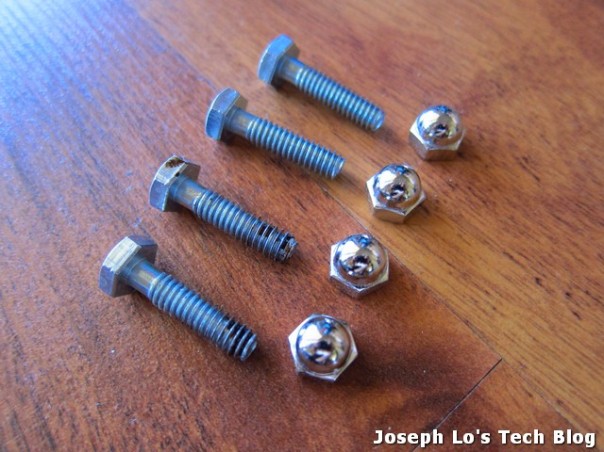
The basic idea is to use threaded bolt to fasten the speaker base panel to this end of the leg. Here is a picture of how the bolts look like. The picture shows the pinewood panel already varnished. The colour is a bit too dark to what I had in mind….but I can excuse myself as I am just an amateur 🙂
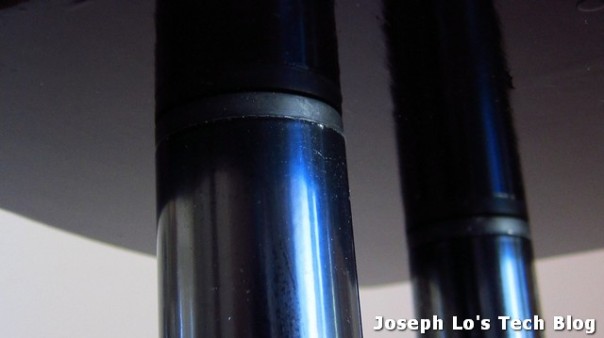
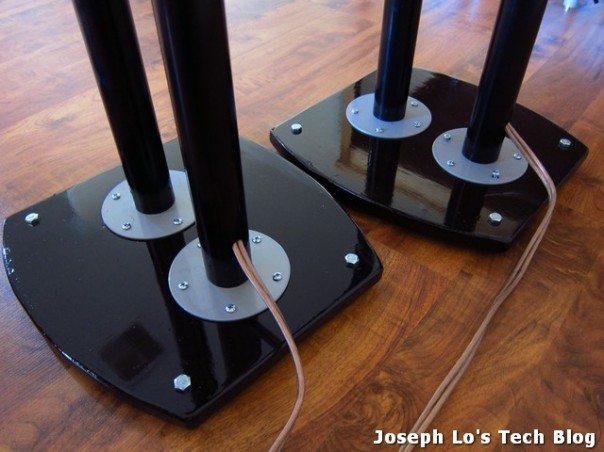
With the threaded bolt through the speaker panel, the Adils leg with be butted against the panel like so. And because we use 2 legs instead of just 1, the connection is very secure and can definitely take the weight of the speaker, if not more. Other people uses a threaded rod to tie the top speaker panel and the bottom stand together. I don’t see a reason I will need to do this as my current setup is already quite sturdy.
The base of the speaker stand is also measured and aligned with the table legs such that they are in the centre.
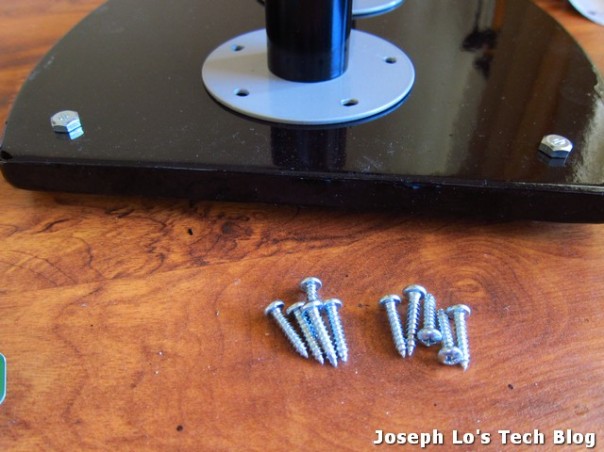
To make the speaker physically stand above the floor, I use a bolt and nut at each corner. Professionally designed speaker stand generally uses spikes as the main point of contact with the floor. I don’t want to damage my wooden flooring so I use dome nuts instead.
The Adils legs are then fastened to the base stand using a bunch of screws. Important to use a screw of the correct length or they will protrude at the other end of the board. We don’t want that.
To complete the installation, we obviously need to route the cables through the leg. Many people recommended to fill the stand with sand or cat litter. Wifey does not like the idea and I decided not to do it. It is not good to make your wife angry. To get the cables through the leg, I carefully use a masking tape to protect the surface before drilling a hole through. I used 12AWG speaker cables. Here are 2 pictures:
 x
x
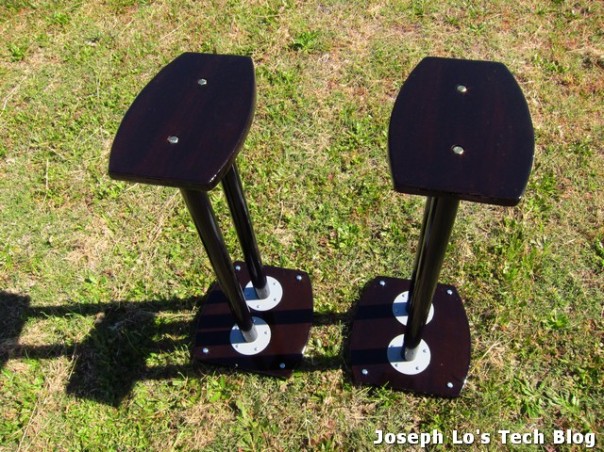
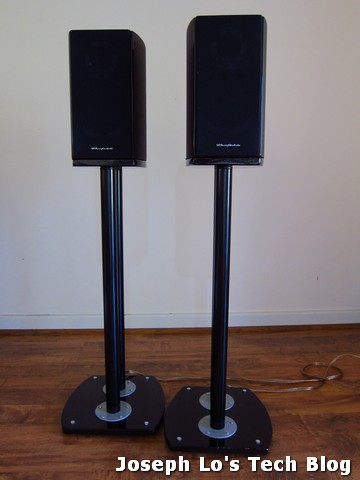
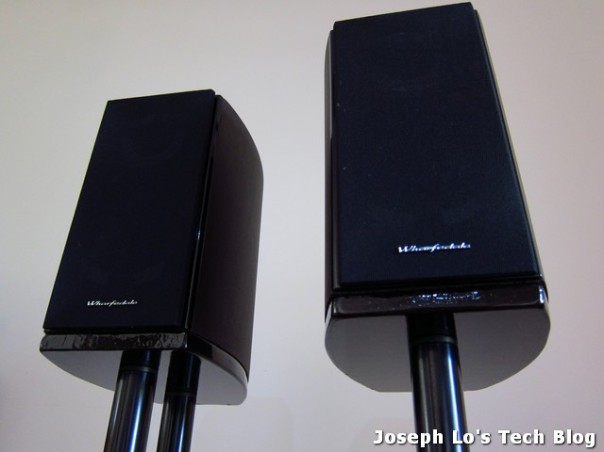
The final speaker stand assembly looks like this.
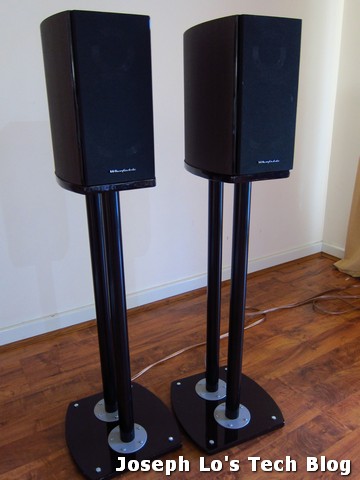
So this concludes my little blog post of how I constructed my own DIY speaker stand. The cost is certainly less than a retail speaker stand and the advantage of building your own is that you can tailor made the design to suit whatever you like. Sure you can just buy from a hifi shop or pay someone else to build it for you but what’s the fun in that? 🙂
We like the aesthetics of our speaker stand and they certainly look better than we initially thought we could achieve.
Thanks for reading 🙂
Edit 2014.10.25. – Reader’s photo submission
Here’s an impressive DIY stand that I think everyone should also have a look at.
https://www.dropbox.com/sh/j0ji9j8r6kouqvi/AAAB-vFy8Lo9Ow-HO5nMjCWTa?dl=0
Edit 2014.04.06. – Reader’s photo submission
And here is Ivan Fedulov’s handiwork. Looks great! More photos at the comments below.

Posted on January 27, 2014, in Audiophile and tagged audiophile, bunnings, Diamond 10.1, DIY, hi-fi, Ikea Adils, speaker, speaker stand, speakers, stereo, wharfedale. Bookmark the permalink. 38 Comments.

What are the dimensions for the base of those stands? I own a pair of 10.2s and have been itching to do the same thing.
Hi greg, the base of the stand is 25cm at its longest width and 30cm deep. Hope that helps 🙂
Cool stands. Came here from ikeahakers…
As for the speakers: we had a tight budget, too and wanted just stereo. But after having heard both of them, we choosed the Diamond 10.2 over the 10.1. In our opinion it’s really worth the extra money, as the sound is much better as they are a bit larger.
Hi Frank. We did also consider the Diamond 10.2 but alas the price difference between the Diamond 10.1 and 10.2 is just too significant for us. The Diamond 10.2 cost about A$495 excluding shipping and the Diamond 10.1 is only $289….plus I have to also buy a Dac and amplifier at the same time…so the decision to go extreme budget at this stage. Thanks for visiting 🙂
Very beautiful and educational project!
Thanks Jacky 🙂
How did you fasten the Speakers to the stands?
Hi Max. The speaker just sit on top of the speaker stand. Because it is rather heavy, it is therefore quite stable. Hope this helps.
Thanks Joe. I suspected that. I’ve got a hyperactive 2 year old so thats a no no for me :-).
If you have kids that may topple over speakers, then no matter how the speakers are fastened to the stand, the entire thing will topple ver anyway….perhaps u need to look at wall mounted speakers. 🙂
I am just doing mine now and following your great idea. I found some laminated pine shelving 300 x 300 mm in Obi DIY store in Moscow and cut the shape of the speakers from them. Then I sanded and sprayed them matt black. They look great. Now I need to get the legs. I think I’ll hunt for some rubber feet though rather than your dome nuts. I’ll send you a photo when I’m done.
Thanks for sharing David. Do post a photo when u are done 🙂
This kind of blog really makes me misty-eyed about the internet community. Something I would never would have thought of. I’ve got the bases and speaker supports jig-sawed and am just starting to assemble.
Thank you, for the trouble you went to in posting.
My Best Regards, Ian.
How did you get a nice gloss black finish on the wood?
Hi Ryan, this can be achieved by vanishing then sanding….and repeated several times. Hope this helps 🙂
Yes, you have to sand the wood well. Then I used a black matt spray can and then sprayed last layer with with lacquer.
Great, very inspiring. You did a good job on the finishing. Congratulations. I just bought a couple of B&W DM601’s and a NAD C315BEE. Off to Ikea now, to get the feet and away from the PC for a while. The round shape is a nice touch…
Thanks wim. That DM601 and NAD sound like a perfect match 🙂 I am sure you will like the sound. Good luck with building the speaker legs.
Done… I changed the design a bit… How can I upload a picture?
Hi. If you have Dropbox, you can upload your picture there and paste here the public link. I will take that photo and add into my post. How’s that.
Sounds good… Here’s the link to some pictures…Choose 1 or more at your discretion. https://www.dropbox.com/sh/j0ji9j8r6kouqvi/AAAB-vFy8Lo9Ow-HO5nMjCWTa?dl=0
That is a fantastic workmanship you have there. Having proper tools for the job also contributes to this success. Congrats on a very good looking speaker stands!
Very good, Joseph! Truly inspiring. Was really happy to come across your article. Currently I`m also trying to figure out which parts to use for building stands for Diamond speakers. IKEA`s ADILS legs indeed a good choice. Also I do like the shape of the bottom plate, it looks good. By the way, what kind of amplifer and DAC do you use with this speakers?
Hi Ivan. I m glad you like the stand. I m currently using a Maverick Audio D1+ as the DAC and a rotel 06SE as the amplifier. The amp also connect via rca to a velodyne sub woofer. Very basic stuff nothing to shout about 😄
Anyway, not a bad setup, myne is far more cheaper (and i suspect receiver is a bottleneck in this chain). Today I’ve purchased that ADILS legs, and one a bit disappointing thing was disclosed:) As it turned out, that plastic adjustable part is just inserted in the metal pipe, so it does not fixed tight enough. I’m planning to replace it with glued in wooden cylinder.
Maybe Ikea changes the construction of the adils legs…..I remember the plastic adjustable part is securely screwed into the leg itself and the entire assembly is pretty robust. Good luck!
Finally my stands are ready!
https://www.dropbox.com/sh/rx8w22np6wu64g4/AADeJpgQf_4uUdK84n6wkmK8a
I took beech wood as source for base and top plates. Dulux Woodsheen was used for finishing coating. Which turned out pretty hard to work with, and I did not successed to get even coverage with it.
Hi Ivan, the stands look exceptionally good! Well done!
Hello Joseph, thanks for sharing this project! I have also made myself such stands for Yamaha PianoCraft’s monitors. I used also Ikea’s wooden kitchen worktop spare material for the top and the bottom of the stands. They look great and, more importantly, the sound improved!
Cheers, Krzysztof
Hello again 😉 Yesterday I have filled the tubes with sand and I found the bass much more precise and under control. I recommend to try for yourself and see if it sounds better!
Wow, thanks. I was looking for speaker stands to go on a new table, and I’m replacing a table with 5 of those legs. Perfect!
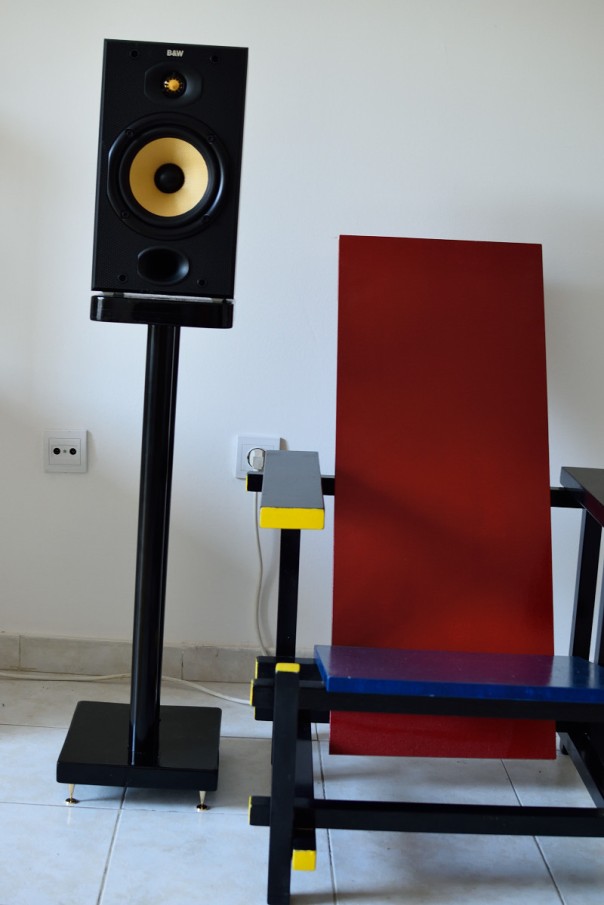
Hello mate. I made these over the weekend following your idea. They fit my Audioengine A5+s perfectly.
My photos are a bit out of order, sorry about that. I repositioned the table legs after taking the assembled photo, and they’re perfect now.
Here’s the photos: http://m.imgur.com/a/Z06Em
Well done mate. Glad this works out well for you.
what bolts did you guys use?
nvm its M8 bolts
Excellent weekend project! Thank you for this.
Wonder if it would work with a single leg per speaker (instead of two), if the speakers are smaller (e.g. bookshelf).
Maybe a larger (and maybe thinner) base could help make it more topple-resistant.
Hello, and thank you for sharing, it’s a great project!
I would like the foot plate to be less visible. I would like to reverse the direction of the feet.
Do you think it’s possible or would it be too unstable?